RADIUS for ASA on Windows Server 2012r2
As old as it is RADIUS is still a pretty nice tool for getting non-Windows services to authenticate against Active Directory. It’s pretty natively supported in most all network devices, has well tested PAM modules, and is well understood by infrastructure systems like load balancers. Hell, it’s even the preferred authentication type for some two-factor systems such as Windows Azure Multi-Factor Authentication Server (né PhoneFacter). This long history and strong support makes it a nice intermediary even if you are not using some of the policy based access and accounting mechanisms.
Choosing a RADIUS server can be a bit of an interesting endeavor. There are a number of options, the most well known seeming to be FreeRADIUS, SteelBelted RADIUS, and Windows Network Policy and Access Services. Since my use case is primarily a Windows shop the answer was pretty simple.
I’m going to be making a few assumptions here. The RADIUS server is a domain joined system, you are using an account with (at least) Domain Admins permissions, and you simply want to restrict authentication to a group of users and not do any kind of advanced policy enforcement.
Installation
Let’s assume you’ve already set up a base Windows box, I’m using 2012r2, that’s been joined to your target domain.
- Get into your target system, via RDP or Console or whatever.
- From the main Server Manager Dashboard click ‘Add roles and features’.
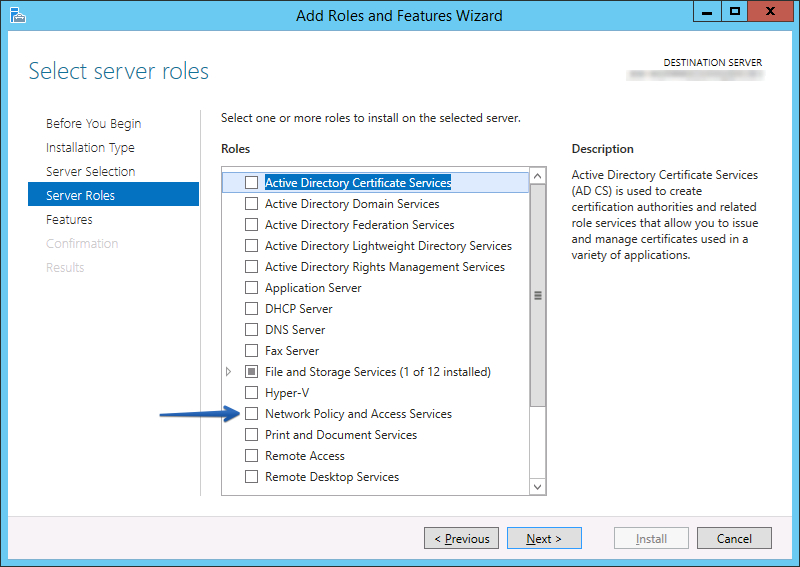
- Click ‘Next’ a bunch of times, 3 times for me, until you get to the “Select server roles” screen.
- Click the “Network Policy and Access Services” checkbox.
- On the pop-up make sure “Include management tools” checkbox is checked and click ‘Add Features’.
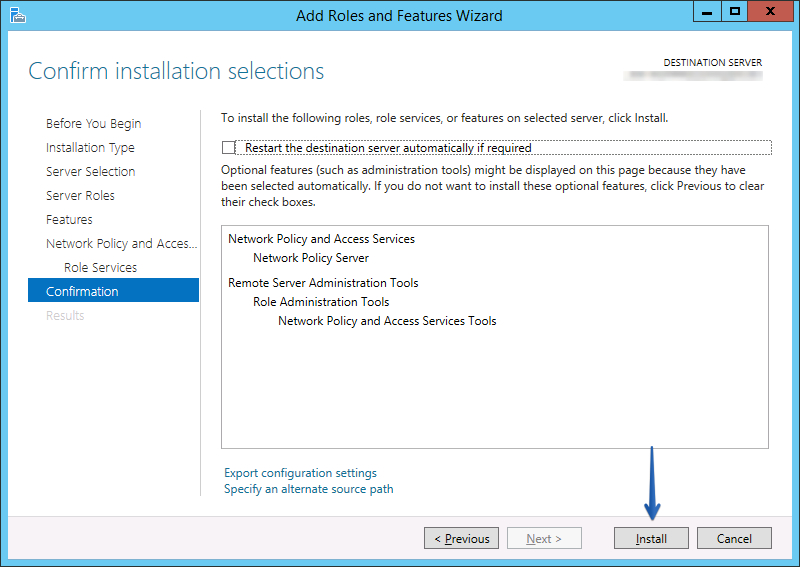
- Click ‘Next’ until you get to the Confirmation page, 4 times for me.
- Click ‘Install’.
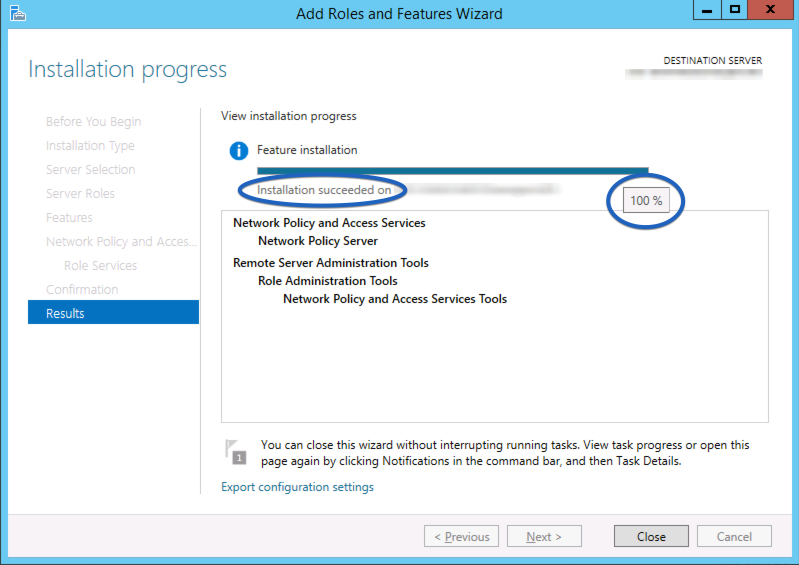
You’ll see a progress meter that will somewhat quickly fill. Completion of the installation is non-obvious but if you hover your cursor over the bar you will see the percentage and the message will subtly change when it has completed. Once it’s finished click ‘Close’.
Configuration
User Setup
Later on we’re going to restrict authentication to group membership. So before we go too far I want to set up a group. If you have a better way to create security groups do so, I’m going to assume the lowest
- Remote into your Domain Controller, or AD management system.
- Launch ‘Active Directory Users and Computers’.
- Browse to the OU that contains your groups.
- Select ‘Action’ -> ‘New’ -> ‘Group’.
- In “Group name:” type ‘VPN Users’. Click ‘OK’.
- Find “VPN Users” in the list, right-click and select ‘Properties’.
- Add an appropriate description.
- Select the ‘Members’ tab and add users as normal.
Permissions Registrations
By default a normal Computer object does not have sufficient permissions to view all of the attributes for users. Specifically it needs access to the credentials and the dial-in properties. Microsoft has a built-in mechanism for enabling this access that they call “registering”. There are a number of ways of registering, however the only one that worked for me was using the command line.
- Click the ‘Start’ button.
- Type
cmd. - Right-click on “Command Prompt” and select “Run as administrator”. Click ‘Yes’ for the UAC elevation confirmation.
- When the shell comes up type:
netsh nps add registeredserver
Client Setups
In order to accept RADIUS connections from an end device we have to configure it in the server as a ‘Client’.
- Click the ‘Start’ button.
- Type
nps.msc - On the left hand sidebar expand ‘RADIUS Clients and Servers’.
- Right-click ‘RADIUS Clients’ and select “New”.
- Enter the Display Name and IP address of the device that will be authenticating against your RADIUS server.
- Select a shared secret.1
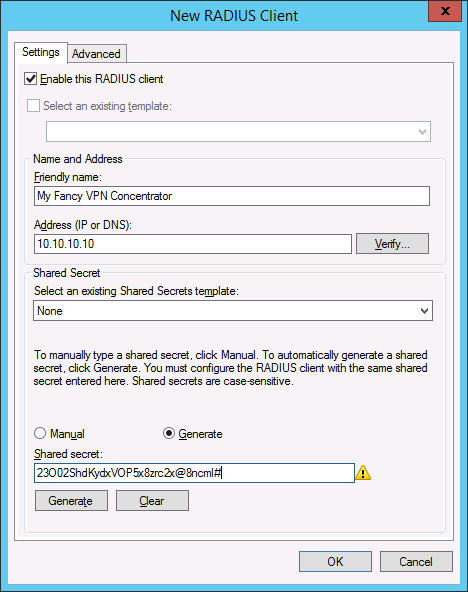
- Click ‘OK’.
Now that we’ve defined our client the device is now able to actually talk to RADIUS and perform authentication. However, before users can authenticate, we also have to create a policy to associate with users.
User Policy
- On the left hand sidebar expand ‘Policies’.
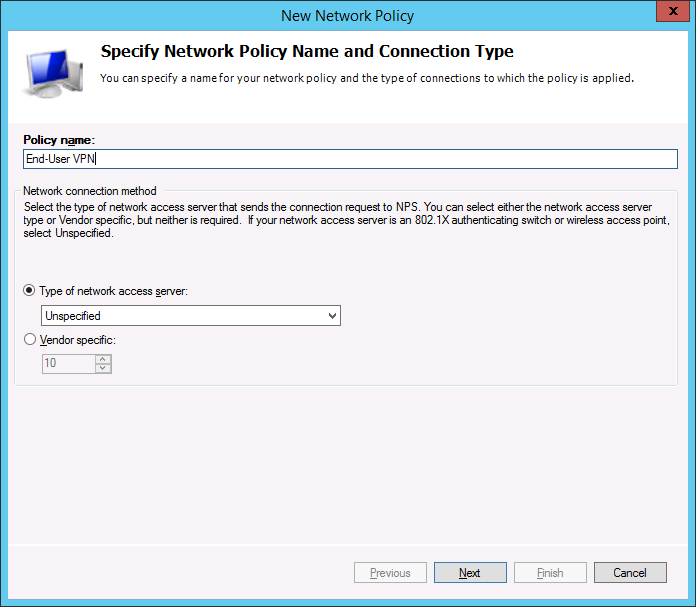
- Right-click ‘Network Policies’ and select “New”.
- Type in a name for this connection policy and click ‘Next’.
- In ‘Conditions’ click ‘Add…’
- Select the “User Groups” option and click ‘Add…’.
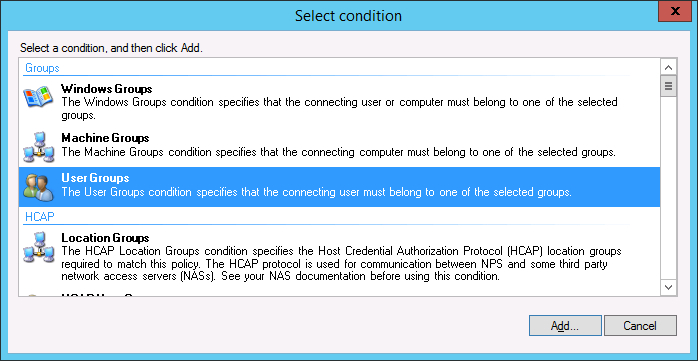
- In the ‘User Groups’ popup click ‘Add Group’ and enter the “VPN Users” group we created earlier.
- Click ‘OK’, ‘Next’. Ensure “Access granted” is selected and click ‘Next’.
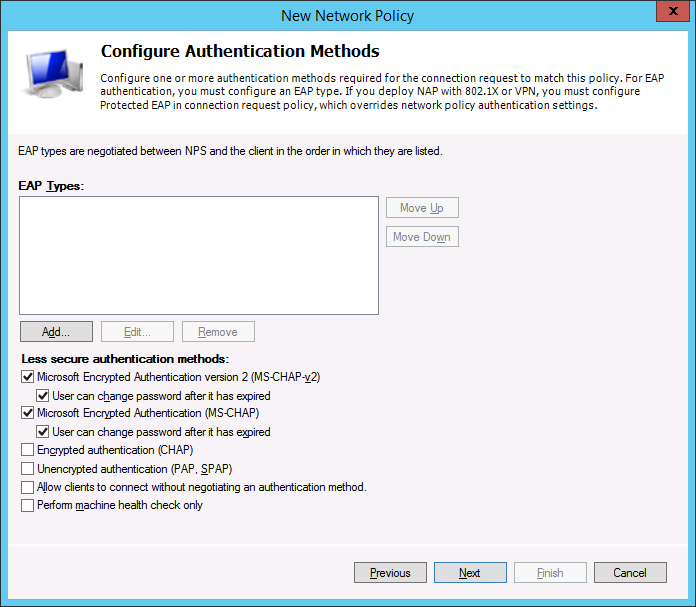
- The default options should be good. Make sure “MS-CHAPv2” and “MS-CHAP” are selected and click
‘Next’.
- No constraints are necessarily necessary. Click ‘Next’.
- No specific policy settings are necessary. Click ‘Next’.
- Review the final options and click ‘Finish’.
At this point you should be able to edit your client device and add the Windows system as a RADIUS server for authentication. That configuration will depend somewhat heavily on the client device is may, or may not, be a post for another day.
-
You want this long enough to be awesome but be careful of the length because some devices have issues with overly long secrets. If in doubt pick something about 30 characters long and be prepared to change it if the device doesn’t connect. ↩︎